2 Below Hat

I have a stash. I hear from reliable sources that it’s rather small considering how much I knit, nevertheless, it’s extensive enough that I often forget treasures in its depth.

Late one day in January, we realized that we’d lost my daughter’s very warm hat. Or, to be precise, she lost it – somewhere between school, home, and various stops along the way. I dug through our hat bin, my hat bin, the next size up hat bins, alas, to no result.

Thus, the stash.  The lost hat was made from Good Karma Farm yarn which is soft enough for hats and scarves and comes in vibrant colors that I love for winter. I had a small sliver of hope that I would find a long forgotten skein of Good Karma lying in wait for this terrible moment. Yet, again my search came up empty. Then my daughter saw it. In the very back of the top drawer of my stash was a bag of forgotten, botched projects, and inside a newborn “hat” made form Rowan Big Wool. As soon as my daughter saw it, she fell in love with the light pink color of this monstrosity, leaving me to frog it.

Trying on the hat the never worked. In the image you can see that the scarf portion is so thick that it does not gather when ribbed.
The wool is thick for this style of project – the scarf portion stretched too much.
Post frogging, I started to rework the crown of the hat. I knit almost all hats from the top down so they can grow with my kids as I easily add more width and height.
Warm hat for a child
Warm hat for a child with ear flaps and braids. This hat has quickly become a favorite for the days when the temperature sinks below 20 and stays in the teens or single digits. When it was -1F one morning, we wore the hat and a hood.

The Warm Fuzzy as we call it, lives on and has been handy for 2 winters now. It seems to have so much fluff built in that it has grown with my daughter as she has grown. I bet in dire circumstances, even I could wear it. 

Squared Away Blanket preview

I have a short preview of one of my favorite creations so far: the Squared Away Blanket. I had written a while ago about the challenge of creating a great blanket for one child and being absolutely unable to create anything worthy of notice for the second.  Good bye that issue!  I have created a beautiful blanket for my second daughter.  I hope you agree.

The best laid plans

All the best laid plans sometimes fail: the night before our trip to the Duchess County Sheep and Wool festival at Rhinebeck my daughter got sick with a fever and despite my husband’s ardent arguments for me going alone rather than face a year of pining for the festival, I could not drive for 7 hours by myself, and so, we didn’t go.

A week later, I asked my best friend to rescue me from the dumps with a visit to the local yarn store – JP Knit and Stitch in Boston’s newly hip and quickly gentrifying neighborhood.  I got 3 skeins of ECO + by Cascade yarns for a coat for my daughter and 2 skeins of Weekend DK by Berroco in Cornsilk (which is the color of sunshine).  I had two baby sweaters to make: one for my husband’s colleague and one for a friend’s nanny who is about to become a grandmother.

For the colleague, I followed instructions for the Eyelet Yoke Baby Cardigan, but I made one change: instead of increasing before and after the eyelet rows, I used the eyelet rows as my increases.  It made for an ever so slightly different result, but it saved me lots of time.

Eyelet yoke baby cardigan

Once I had to make the second version of this, of course, I had to follow my modifications.  I also thought that the body on this sweater was a bit too wide, so I omitted the raglan increases after the yoke increases.

Here is the final product (I will post detailed directions at some point soon).

If there is any different in perceived color, it is merely due to the lighting.  These are knit from the same exact yarn and dye lot.


Knitting the same thing twice

There is an old Russian expression that translates roughly as “You can’t step into the same water twice.”  That’s so true and I’ve recently realized that you simply can’t knit the same thing twice either. Either your hands, your yarn, or the humidity in your house will change and something will be just a little different.

Three years ago, I bought Blue Moon Fiber Arts Woobu in a beautiful blue hue to make my husband a sport weight sweater.   It took me two years to make the sweater and I had to improvise the pattern as I went along, even though I started with Elizabeth Zimmerman’s Brooks Sweater, which was just the sort of thing my husband wears exclusively.  The trouble started around the shoulders where her suggested shaping was creating curves along the arms/shoulders, rather than a straight vertical line up.

Having knit many a sweaters in the contiguous method, I realized that this shaping was simply the inverse of the arm shaping in the contiguous pattern and after about 5 tries to get the proportion and placement right, I was able to create a beautiful shoulder curve.

My husband, to give  him credit, wears the sweater almost every day, especially as we’ve been pummeled with snow and arctic temperatures all winter.  So, you can imagine my surprise when he said that he wants a new Brooks Sweater. He’s timing it ahead so if it takes me another 2 years to make him the next sweater he’ll be ready for it because this one will develop holes.  And so, I’ve started my NYS Sheep and Wool list:

– 2 skeins Blue Moon Fiber Arts Woobu

I can’t wait!

Blanket blues

Baby blanket from Elizabeth Zimmerman's pi shawl
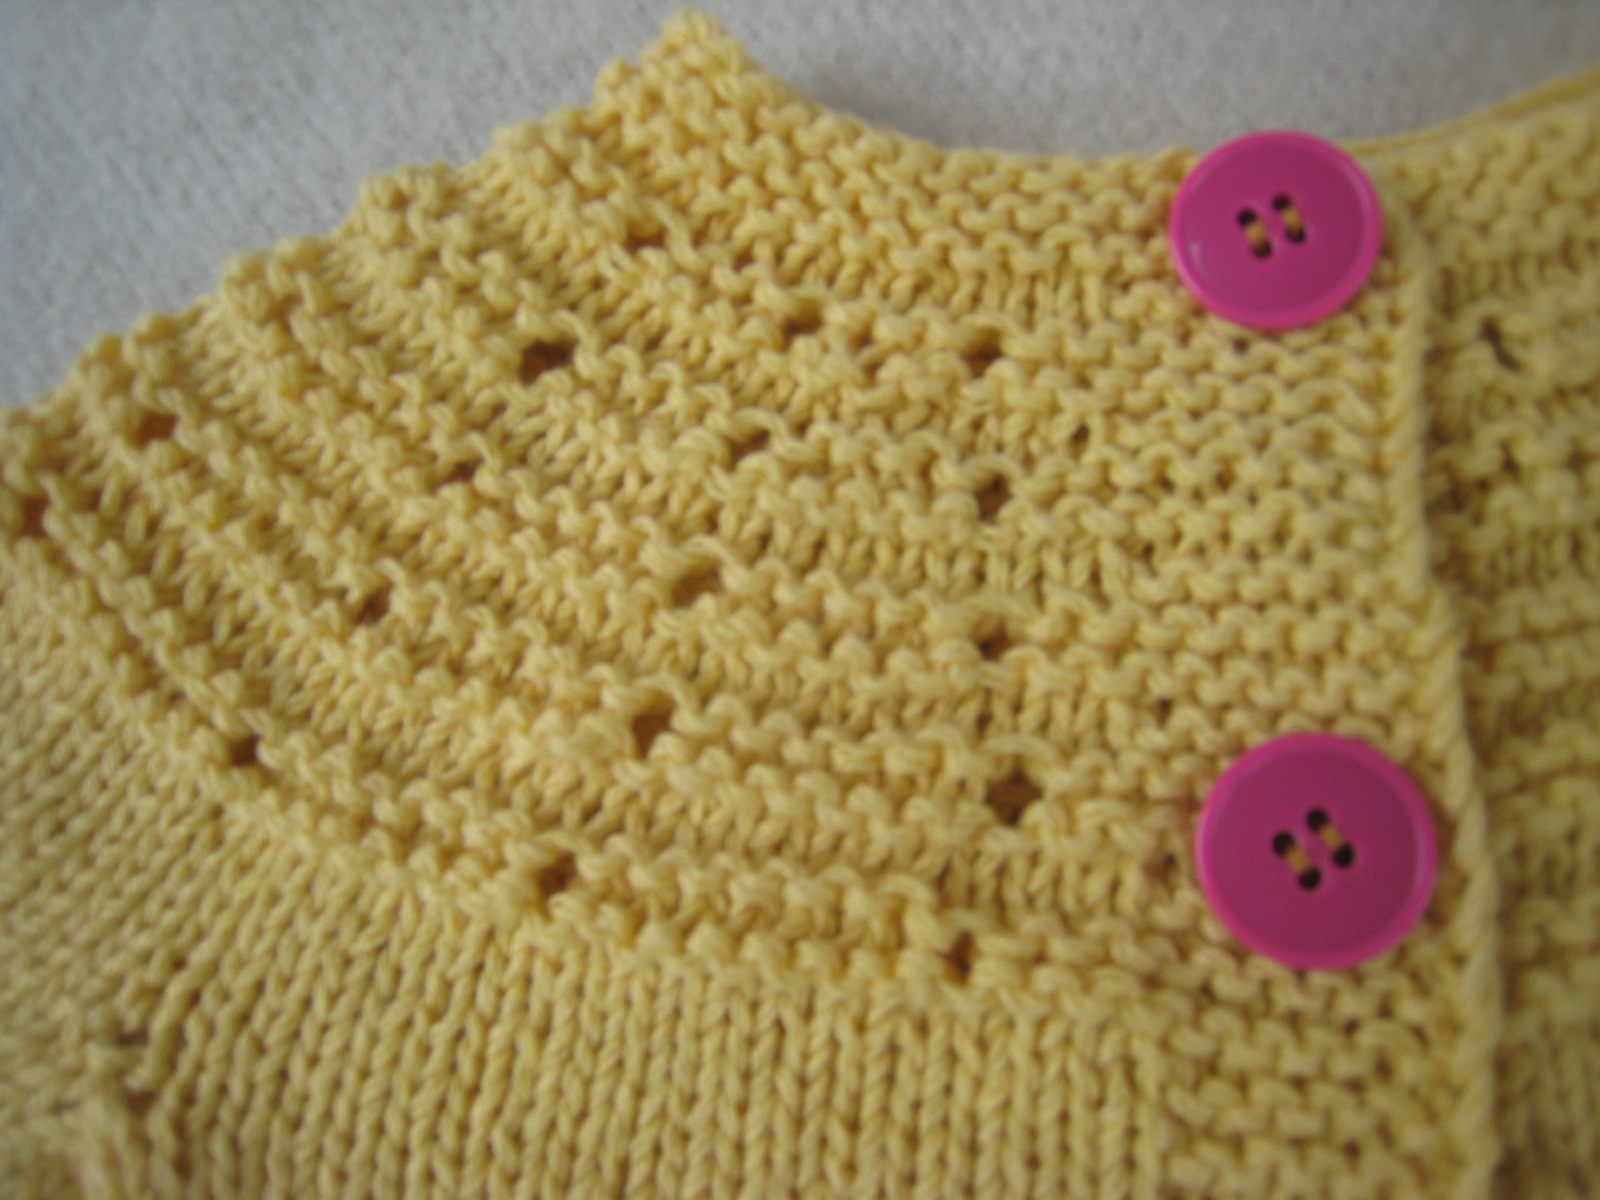
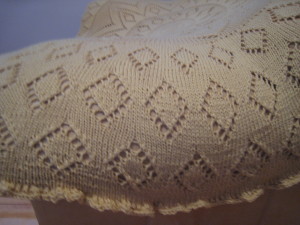
I have two children.  When my first was a little girl, probably around age 1, I knit her a perfect golden blanket.  The blanket came so easily, I don’t even know how it happened.   I got the yarn in a good weight, it was superwash which fitted our sensibilities at the time, and the pattern, Elizabeth Zimmerman’s shawl, was the perfect match.  My daughter still has the blanket and loves it: we spend many reading moments with it.

Step 1: start off

Fast forward 4 years later, I have a second child who is about the same age and I start feeling the pressure to make another perfect blanket.  In retrospect, I should have gotten some of the same yarn in a different color and called it a day.  But I didn’t.  I decided that my kids were different enough that I had to make a completely different blanket, in a different yarn and with a different shape.  Thus I started on another Zimmerman pattern: the square blanket knit from the center out.

Baby blanket from Elizabeth Zimmerman's shawlThings went wrong from the get go.  I had purchased 3 skeins from Brooks Farm yarn at the NYS Sheep and Wool Festival in Rhinebeck and once I knit those up, I quickly realized that those skeins go very quickly in a square blanket.  The last skein added at most 1″ to the whole project.

Step 2: get more yarn

In desperation, at the next NYS Speep and Wool festival I bought what I thought was the same yarn, but they didn’t have the same colors.  Why didn’t I ask the lovely lady if I was buying the correct item is beyond me.

Once I started knitting, I realized that what I bought is much thicker (think bulky vs worsted or may even sport) than what I needed. In desperation, I emailed the farm.  They confirmed based on my hastily taken pictures in a hotel, that I was in fact knitting with the wrong yarn.  I upped the needle size between rows and the blanket grew, but over time, you could easily see that it just wasn’t correct.

This year, I made a second attempt to buy more yarn at the Sheep and Wool festival in Rhinebeck. I was determined to go back to Brooks Farm yarn and get the correct yarn.

Ha ha!  The yarn has been discontinued.  I almost cried right then and there and spent the rest of my sheep and wool darting form one booth to the next in a desperate search for something that will work.  I came up with nothing.

Step 3: start anew

When I got home, I was determined to find yarn that was not only the same weight but also the same color – or at least matching one of the colors that was in the original blanket.

I ordered 5 skeins of Brown Sheep Nature Spun chunky wool which I had seen at Rhinebeck and was certain would match in thickness. $70. I sure wish that I had taken a picture of what I saw at Rhinebeck because once I started knitting it up, it became obvious that I yet again had the wrong yarn.

I admitted defeat.  I was not going to find the same yarn and I wasn’t willing to pay Brooks Farm to match one of the colors in the few remaining undyed skeins they had  (in retrospect, a money saving venture).  Now, I had 5 skeins of a very dark purple yarn, which in itself was not enough to make a blanket for a child who is now almost 4. I was determined to finish this blanket, and make it the most beautiful thing I could knit. In desperation, I bought more yarn in pink and light purple – another $70. Note to the dear reader: I never buy yarn in this unabashed gorging. I make lots of lists and buy yarn to match a specific pattern.

So, I had a giant collection of very chunky yarn and I set off to work.  I wanted to make a rectangular blanket from the center out, knit much like its square cousin. I even made a few swatches working out the technique.  Things were looking up. I had a color scheme and a design.  That was, until I took it off the needles after working 3 skeins into the whole thing.  It bubbled in the center! Rip.

By now, I was feeling pretty manic.  The good thing is that my kids are pretty oblivious to the hard line goals I set for myself and so while they noticed that I kept knitting and ripping out lots of different layouts they only said “Mom, why are you ripping that out again?” but not “My blanket is too small. Why haven’t you made me a new one?”

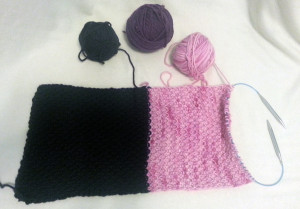
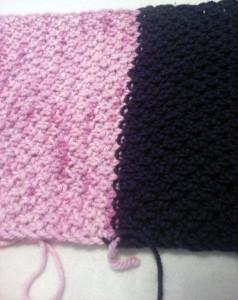
At this point, I had to find a pattern, so I went to Ravely.  I found a double seed stitch blanket design that I really liked.  The only problem is that I don’t have the needles to knit such long rows, plus, since I didn’t have equal numbers of skeins in each of the 3 colors, it would be quite a challenge to figure out how to make different colored rows look elegant.  I had to make it work in squares, so I could knit it a little at time, but, since I don’t like to cut yarn, I had to make it work in such a way that I could knit 1 square and then knit another square adjacent to it from the same skein.

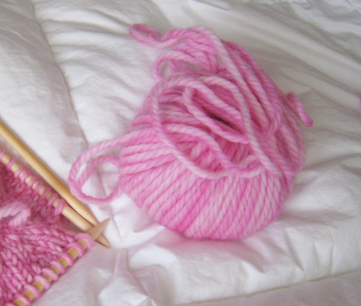
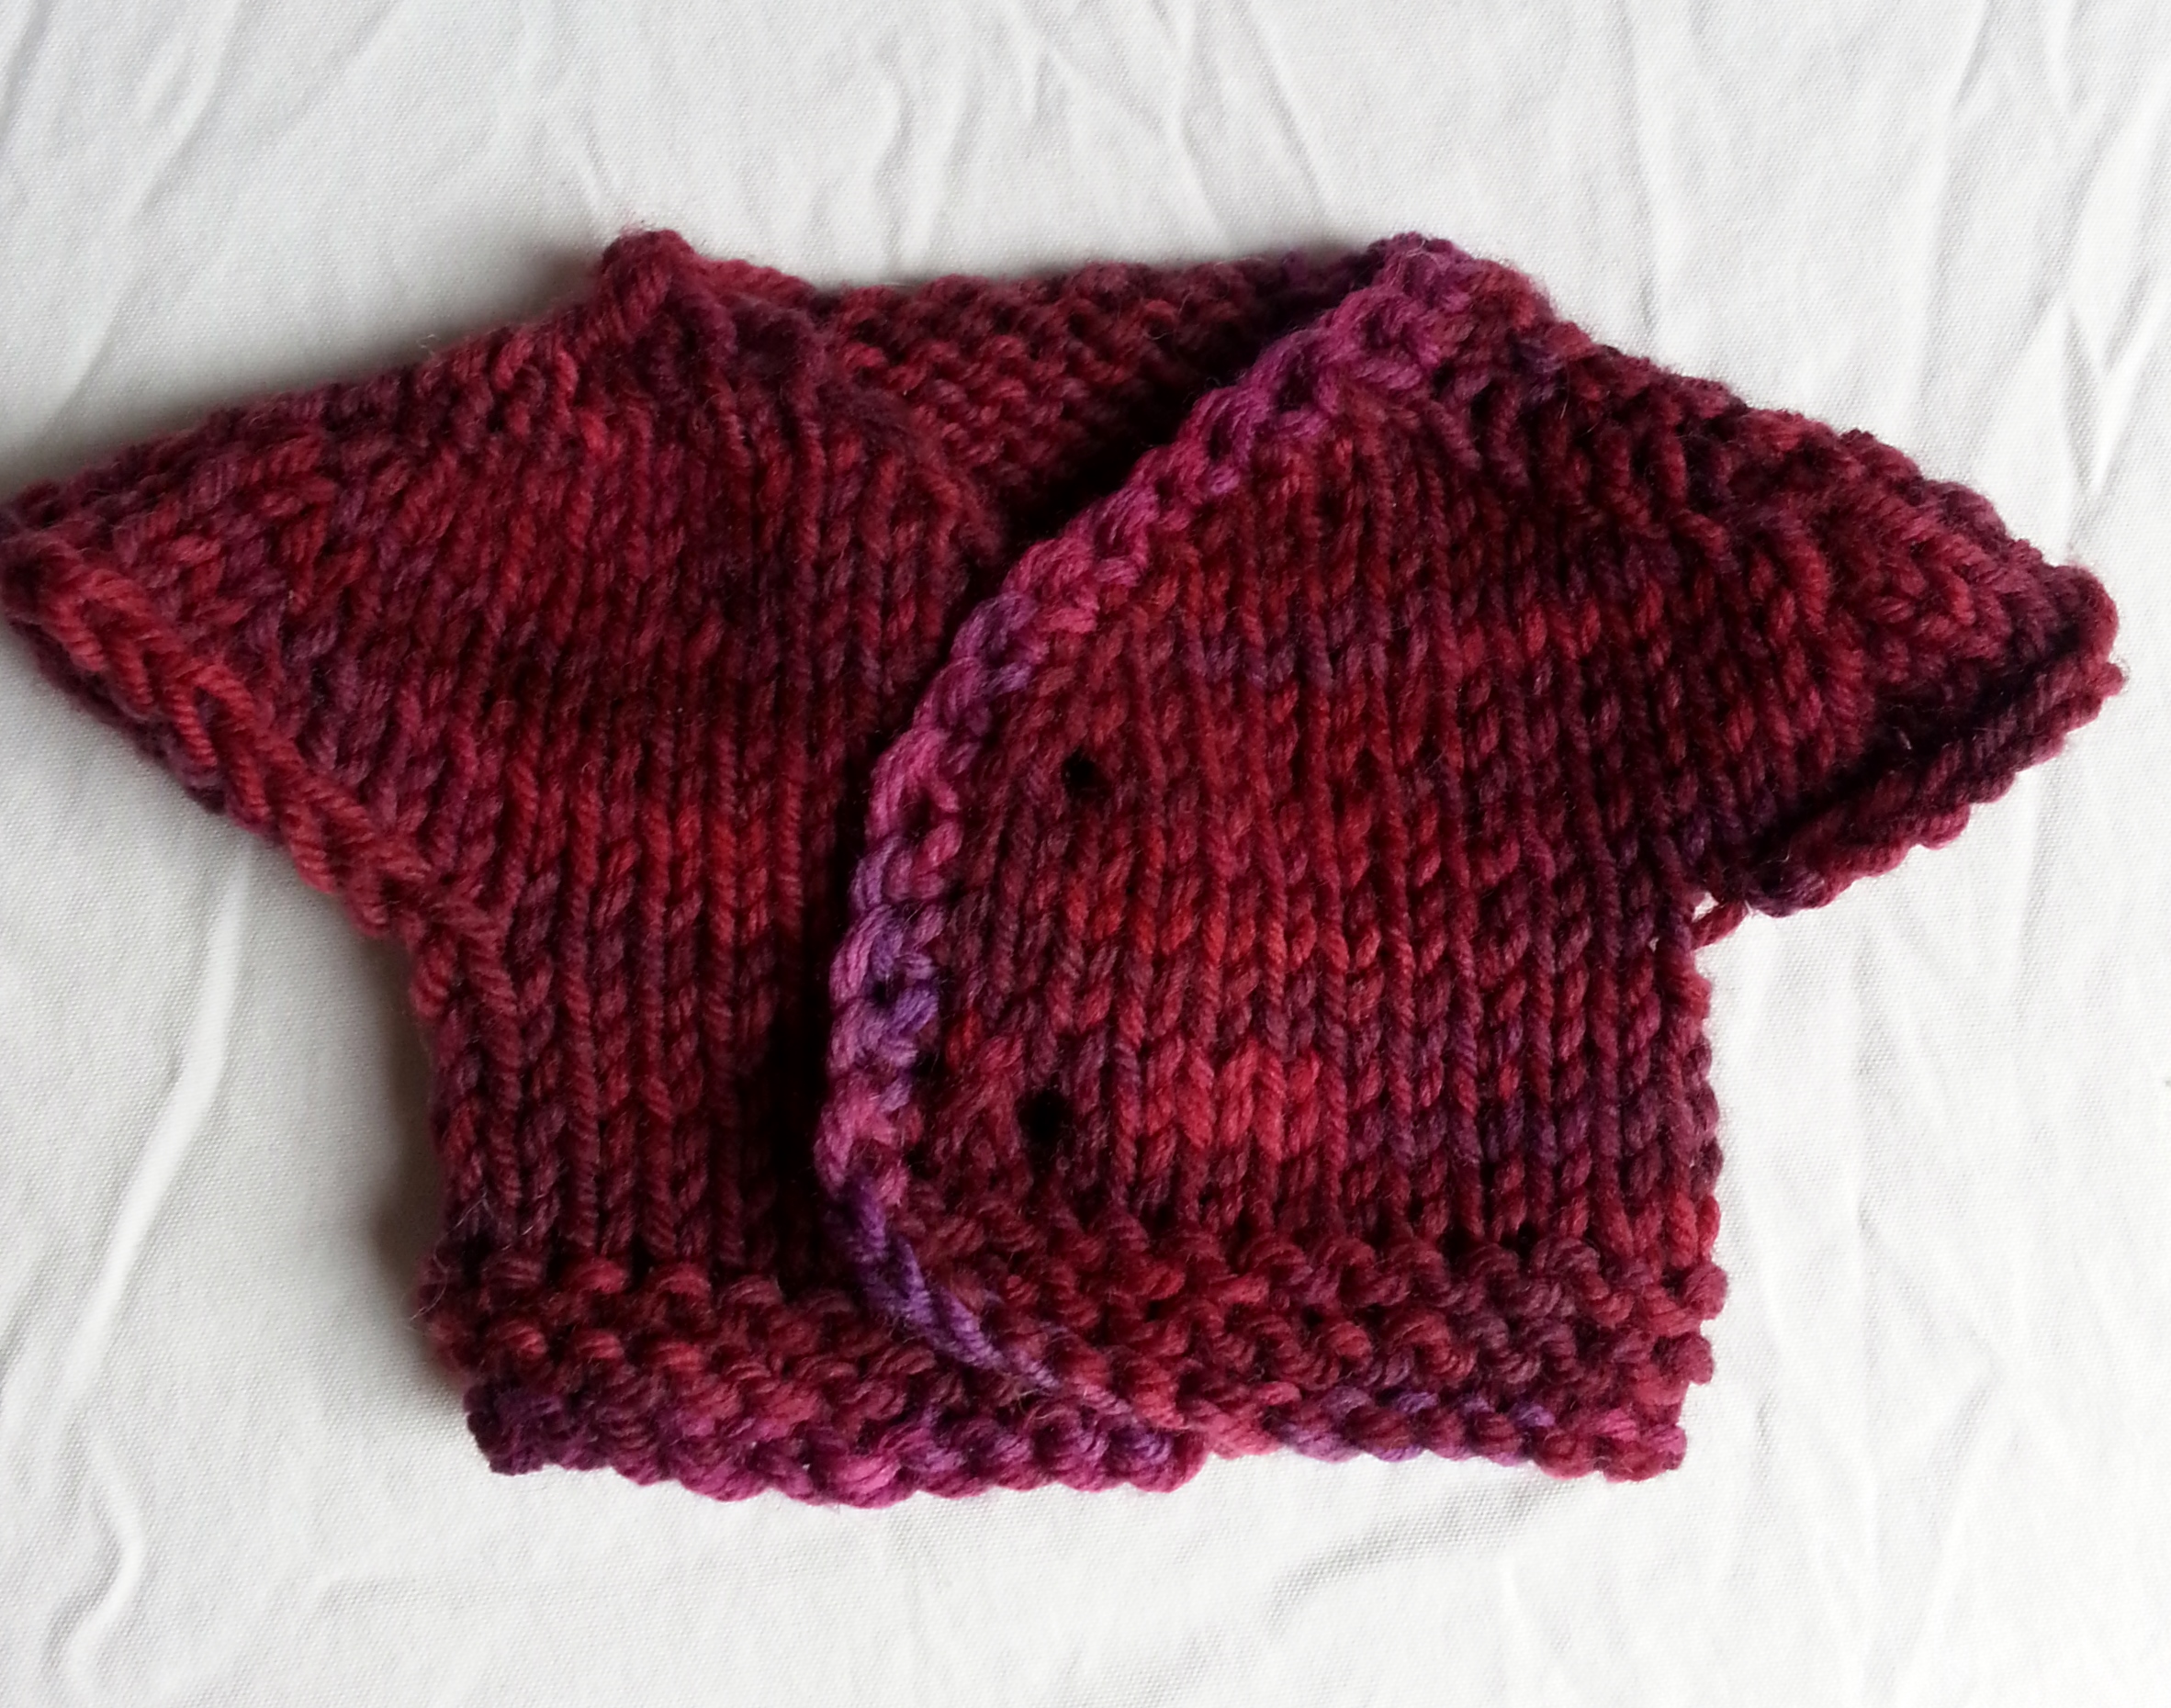
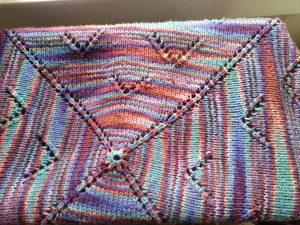
I swatched for about a week to figure out the size of the square I could knit that would take up exactly 1/2 a skein and then, I started.  It looks beautiful.  I’ve made two squares and I will write up the pattern and you will see how I have figured out a way to knit the squares without cutting yarn and binding off at the end of each square.  Here is the dark purple and the pink together and you can see the ball of the light purple that I will also use alternating.

While I will be making a rectangular blanket, you could use this technique to make square blankets or even odd shapes.

Spring Berets and clothing for dolls

For years now I’ve been trying to make a spring beret for myself.  I knit very fast and most berets are knit in the round, which makes this an easy project to accomplish. But I have finally accepted the source of my many failures.  Try as I might, I simply cannot create a light spring beret from DK yarn.  I will have to go backwards: find a pattern and then buy (yikes!) the yarn they recommend.  That will be a first.

In other news, I’ve been working on some gifts for my kids and decided to make clothing for their dolls.  Here are some of my creations:

Doll's dress with lace Doll's dress with Velcro closure and lace

This dress was so simple to make that I am astonished how good it looks.  I wish I could tell you the yarn, but I have no idea where it came from.  I found it in my stash, balled up and unlabeled.  It’s a cotton blend.  Here are some very sketchy directions: Cast on 36 sts and work for 4 rows in seed st.  Then keeping the first and last 4 stitches in seed stitch for the closure, work the rest of the stitches in stockinette stitch for about 2″.  Join in the round and work 2 rows in teh round.  Knit 2, m1 all around, then knit one round even.  Then Knit 3, m1, and continue this way until you have done Knit 5, m1.  Then knit evenly for 4″, and finish with another 4 rows of seed stitch.  I added 2 straps and a belt detail with 1/2″ lace I had on hand.

A skirt, hats and a baby sweater:

Knit doll's skirt knit hats for dolls Doll's sweater knit using the contigous method

To make the skirt, cast on 32 stitches, and work k2, p2. On the wrong side, work the established pattern.  Repeat these 2 rows for 1 inch, then (K3 and M1) repeating to the end of the row.   Work in stockinette stitch for 3″ and finish off with 2 ridges of garter st. This is a great way to use up some leftover sock yarn.

The sweater is made using the contigous method.  Look it up on Ravelry.  I can’t thank the creator of this method enough for sharing her creation with the world.  As you can see, I even make doll’s sweaters this way now. All you need to guess is the approximate width of the back of the neck. From there, you can adjust the shoulder and sleeve size as you go.


Learning something new

I picked up a great book from the library written by Col. Hadfield called An Astronauts guide to life on earth. As an engineer, the title was immediately interesting to me: how do astronauts do all the things that they do and what is it that they do for years when they are not in space. It turns out that the best study lots and lots of subjects, from orbital mechanics to plumbing to geology. Fascinating book, and after 2 nights I am already 1/2 way through it.

What does all this space exploration have to do with knitting? Just when I allowed myself to think that I know what there is to know about cast on methods, I learned a new one: crochet cast on. See this tutorial for an explanation.

I need the cast on for a raglan sweater I am making for my mom. This project has been more than a year in the making. I made my mom a sweater for the holidays last year (that’s 2012, not 2013). And it turns out that it was too small. Then I decided I should actually measure my mom to make sure that I get it right second time around. I measured and bought yarn from Brooks Farm at the Rhinebeck Sheep and Wool Festival. Now, all that stands in my way is the lack of time and the crochet cast on which requires a crochet hook. I must have one of those lying around somewhere.

Burly whirly hat in aqua blue with mods for kids

I made a hat from a Bernat pattern called roving – cable hat. I love it. I used malabrigo chunky in Tuareg 98.

New term: wables: cables that are wavy.
I did change a few things. First of all, I never knit hats flat, so I made this in the round thus avoiding the “bald spot” in cables as someone called it on ravelry. Also, I upped the needle size. I am a loose knitter and even at the exact gauge my hat fit too tightly to be comfortable. I upped the needles to size 13 and probably could have gone to 15 and still had a great hat, but one that actually fit and poofed out a bit more.

Inspired by this beautiful hat, which I love, I made two for my kids. You’ll want to download the Bernat pattern to make sense of these directions.

For age 5-6
Cast on 48 st on size 9 needles. Join in the round, being careful not to twist and knit in a knit 1, purl 1 rib for 1 inch. Increase as follows: [(k2, m1) 5 times, k2] 4 times for a total of 68 st.

Switch to larger needles(size 13) and knit 1 round.

Do the double 4 on 4 cables 4 times, doing a purl st between each repeat. Then work 10 rounds even. Next round, k15, sspo( slip the next stitch, knit 1 stitch and pass the slipped stitch over the knit stitch), 4 times to decrease the purl stitch.

Next cable row: k4, work the cables 4 times around.

Work 5 rows even then decrease:
K3, k2 together, until the last 4 stitches in the round, k4.Knit one round.
K2, k2 together, all the way around. Knit one round.
K1, k2 together, all the way around. Knit one round.
K2 together, all the way around. Knit one round.
K2 together, break yarn and pass through the remaining stitches.

For size 2-3
Cast on 40 stitches. Join being careful not to twist and knit in a knit 1 purl 1 ribbing for 3/4 inch.

Increase to 65 stitches, by working as follows m1, [(k2, m1) 4 times, k1, m1, k1, m1] 4 times.

You will do the cables the same way, except instead of a 4 on 4, you’ll do a 3 on 3, 5 times around, and finish off as the child’s hat above but only after 4 rows above the second set of cables and only 8 rows in between.

Warmy Hat – a pattern for a winter hat in a chunky yarn

Let’s say you have some down time and a skein of Burly Spun that’s sitting around. Here is a great hat that I made for a friend’s daughter. Looks great and feels luxurious, and of course, now i have to make more for my own kids since they loved it.  I called it Warmy because it’s warm and snugly – so there you get the hybrid.  Here is an overview of the finished product with the pattern following.  Check back as I will post a video on how to twist stitches for those of you who have never done this technique before.

Hat overview:

How to twist the knitted stitches:

Here is the pattern:

Yarn: Burly Spun by the Brown Sheep Company.  This color is called Lotus Pink.

Needles: Size 13 needles.

Gauge: 2.75sts per inch (in the k1, p3 pattern).

Child size: 17″ around, approximately 2-4yo.  But it’s fairly stretchy, and for a larger size, increase the main section in length.

Cast on 48 sts.  Join being careful not to twist.  Work the border (k1 twisted, p1) repeat all the way around for 1″, about 5-6 rounds.  Change to the main pattern of (k1 twisted, p3) all the way around.  Work even until the hat measures until 5″.

Decrease:

Round 1: K2tog twisted (worked like twisting one, just catch the back of both the knit and purl st that follows it), p2, k1 twisted, p3 all the way around. 42sts.

Round 2: Work 1 row even (knit the twisted stitches, being sure to twist them, and purl the purl stitches).

Round 3: Repeat (k1 twisted, p2, k2tog twisted, p3) all the way around. 36 sts.

Round 4: Work 1 row even.

Round 5: Repeat (k2tog twisted, p1, k1 twisted, p2) all the way around. 30sts.

Round 6: Work 1 row even.

Round 7: Repeat (k1 twisted, p1, k2tog twisted, p1) all the way around. 24sts.

Round 8: K2tog twisted,  k1 twisted, p1) all the way around. 18 sts.

Round 9: (K1 twisted, k2 tog twisted) all the way around. 12sts.

You should have 12 sts left.  Cut yarn with approximately a 6” tail, weave in.  Weave in cast on end.

You can make a pom pom for the top or you can leave it as is and the hat will be reversible.

How to make a hat from a great headband pattern.

Making a hat from a headbandI just figured out how to knit a hat from a headband. I had a headband pattern, but I wanted to try making a hat from it, without having to pick up the stitches from the edge of the headband once its done.  If you have noticed a pattern of the things I design, I HATE cutting yarn.  Making one stitch at the end of the row is the basic idea here.  You can see the example in the image on the right.

Here are some basic instructions:  Every row you are making, cast on a stitch at the end but first, with the yarn in the back, wrap the yarn around the cast on st from the previous row, then using the backwards loop method cast on one stitch and then continue in the headband pattern.   Then you will have a headband that you’re knitting and at the same time, perpendicularly, adding stitches to the hat.

I am starting with 1 stitch per 2 rows, but I think this is too little and I will have to k2, m1 on the first row.  More to come.